
Intro
Concrete pump line cleaning is all about restoring a clean, safe, and obstruction-free pipeline immediately after a pour. A proper cleanout prevents hardened buildup, reduces wear on hoses and steel pipes, and keeps the next shift running efficiently.
In this guide, you’ll learn the standard water flush, the single-ball and two-ball methods, essential flow/pressure control tips, and the key safety steps every crew should follow.
For diameter selection, always use the Sizing Guide:
https://www.kinsoe.com/sponge-ball-sizing-guide/
And for the full series overview, refer to the main pillar:
https://www.kinsoe.com/sponge-cleaning-balls-fast-buyers-guide/
Before You Start — Safety & Setup
Concrete pump line cleaning involves stored pressure, long pipeline routes, and heavy moving components. A safe, controlled setup protects both your crew and your equipment. Use this checklist before every cleanout.
1. Lockout/Tagout & Depressurize
- Ensure the pump is in a neutral, safe state.
- Fully depressurize the line before inserting any ball or plug.
- Confirm safe discharge direction—nobody should stand in front of the outlet.
2. Inspect Line Geometry & Fittings
Check all points where a sponge ball is most likely to slow or catch:
- Reducers (tightest I.D. points)
- Elbows, especially tight-radius bends
- Clamps & gaskets—look for misalignment
- Weld lips or sharp internal edges
- Hose sections (ovalization or wear)
If edges are sharp or lips protrude, note the location—it will impact your ball hardness choice.
3. PPE & Site Safety Rules
- Eye and face protection
- Heavy gloves
- Hard hat and safety clothing
- Keep all personnel clear of the discharge area
- Maintain a clear communication protocol between pump operator and spotter
4. Ball & Water Preparation
Select the correct:
- Ball diameter (oversize rules from the Sizing Guide)
https://www.kinsoe.com/sponge-ball-sizing-guide/ - Hardness (Soft/Medium recommended for complex routes)
https://www.kinsoe.com/sponge-ball-materials-hardness/
Also prepare:
- Adequate flush water volume
- Clean water source (avoid debris that may obstruct reducers)
5. Team Roles
- Pump Operator: controls pump flow and pressure
- Spotter at Discharge: confirms ball exit and checks clarity of water
- Assistant: watches reducers, elbows, and changes in pump tone or pressure
Use radios or a hand-signal protocol to sync pump speed changes.
Method 1 — Standard Water Flush with Single Ball
The single-ball flush is the simplest and most commonly used cleaning method for daily operations, especially when the line is mostly straight and residue levels are moderate. It’s fast, reliable, and safe when performed with correct sizing and steady flow control.
When to Use This Method
- Routine end-of-shift cleaning
- Straight or gently curved hose/pipe routes
- Moderate residue levels
- Systems without complex boom sections
- When speed and simplicity are priorities
If the line has heavy buildup, steep vertical sections, or long boom arms, you will likely need the two-ball method (covered next).
Step-by-Step Procedure
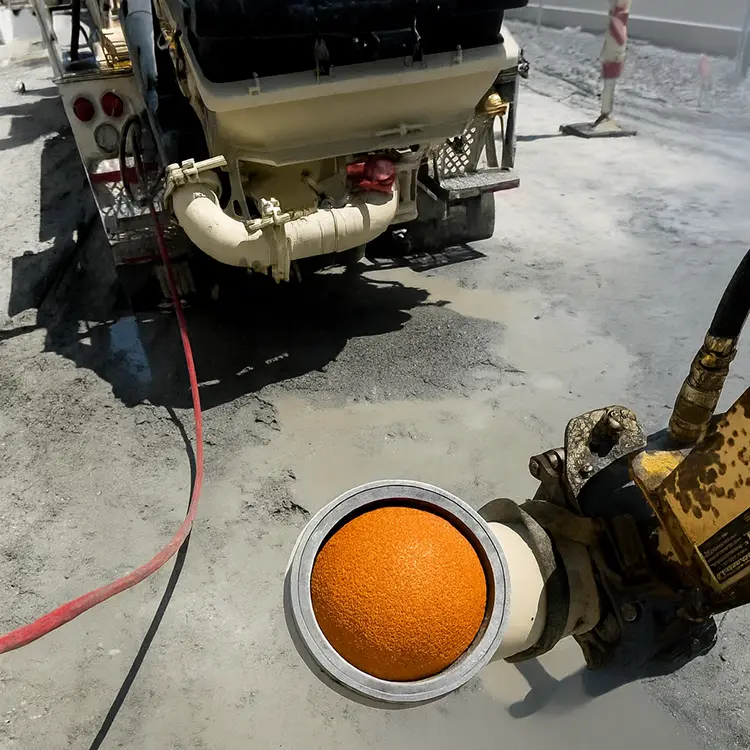
- Insert the Sponge Ball
Place the cleaning ball at the hopper or designated insertion port.
Ensure it matches the correct oversize and hardness for the line:
https://www.kinsoe.com/sponge-ball-sizing-guide/ - Start with Slow Pump/Water Feed
Begin with a low, steady flow to allow the ball to seat and compress.
Avoid sudden surges that could force the ball sideways at reducers. - Increase Flow Gradually
Once the ball begins moving smoothly, increase flow to a stable cleaning velocity.
The ball should maintain continuous forward movement without stopping or jerking. - Monitor Key Geometry Points
Pay attention to:- Reducers
- Tight elbows
- Mixed hose–steel transitions
If pressure rises here, slightly reduce flow or consider using a softer ball next time.
- Confirm Discharge
The ball should exit the discharge point cleanly.
The water that follows should run clearer with minimal fines. - Inspect the Ball
Look for excessive wear, tears, or deformation. If severe, adjust material or hardness next time:
https://www.kinsoe.com/sponge-ball-materials-hardness/
Pro Tips
- Maintain consistent flow—avoid pulsing or abrupt speed changes.
- If the wipe seems weak, the ball may be too small or too hard (see Troubleshooting).
- Keep personnel well clear of the discharge zone during ball exit.
- Use fresh water for the flush to avoid carrying debris into reducers.
Troubleshooting stuck balls or poor wiping:
https://www.kinsoe.com/sponge-ball-troubleshooting/
Method 2 — Two-Ball (or Ball + Plug) Method for Booms
The two-ball method is the preferred technique for boom pumps, long pipeline systems, and vertical sections where gravity, bends, and residue tend to create inconsistent wiping. By placing two balls (or a ball + plug) in sequence, you create a controlled water slug that delivers a stronger, more uniform clean than a single ball can achieve.
When to Use This Method
Use the two-ball method when you have:
- Long boom arms
- Steep vertical sections
- Heavy residue after extended pours
- Old or rough lines needing stronger wiping
- Situations where a single ball fails to clean consistently
If your wipe quality is uneven or slurry remains after a single-ball flush, this is the correct escalation step.
How the Two-Ball Method Works
Two balls separated by a controlled water volume act like a pressurized cleaning capsule.
The leading ball pushes water ahead, while the trailing ball compresses the water slug, generating:
- Higher wiping pressure
- More uniform wall contact
- Reduced “ball skipping” at elbows
- Effective cleaning in vertical sections
This is especially helpful when the line configuration creates natural stop-and-go points that disrupt a single-ball clean.
Step-by-Step Procedure
- Insert the First Sponge Ball
Typically Soft or Medium, with correct oversize:
https://www.kinsoe.com/sponge-ball-sizing-guide/ - Introduce Water to Form the Slug
Add a controlled volume of water (usually 1–2 pipe lengths, depending on hose size).
The goal is to create a pressurized “cushion” between the two balls. - Insert the Second Ball (or Plug)
This ball should match or slightly exceed the hardness of the first.
Many operators prefer:- Ball 1: Soft
- Ball 2: Medium
This combination balances passability and wiping force.
- Start Pumping Slowly
Begin with low, steady pressure.
The two balls must start moving together, maintaining spacing. - Increase Flow Gradually
Once movement is consistent, increase pump flow to create proper compression of the water slug. - Monitor Critical Points
Watch for pressure spikes at:- Boom elbows
- Reducers
- Vertical bends
If pressure rises sharply, slow the flow and allow both balls to seat correctly.
- Confirm Dual Discharge
Both balls must exit the discharge correctly.
Water should follow clear, showing the removal of slurry and fines. - Inspect Both Balls
A difference in wear between Ball 1 and Ball 2 indicates different friction conditions—useful diagnostic data for future sizing/hardness adjustments.
Why This Method Works Better for Booms
- Improves cleaning in vertical sections where gravity slows wiping
- Adds uniform hydraulic pressure across complex geometries
- Reduces the chance of a ball stalling in mid-boom
- Enhances wiping without requiring excessive oversize or overly hard balls
Risks & How to Mitigate Them
- Balls sticking or slowing at reducers:
→ Use softer hardness before downsizing. - Poor spacing between the two balls:
→ Start with slow flow until movement stabilizes. - Pressure spikes:
→ Reduce flow immediately; inspect reducers for internal lips. - Second ball overtaking the first:
→ Increase initial water slug volume.
When in doubt, follow the stuck-ball checklist:
https://www.kinsoe.com/sponge-ball-troubleshooting/
Flow, Speed, and Pressure Control
Proper flow and pressure management determines whether a sponge ball moves smoothly, cleans effectively, and exits safely. Even with the correct size and hardness, poor flow control can cause skipping, stalling, or unnecessary wear on the line.
Target Behavior: Smooth, Stable Flow
The ideal cleaning run maintains a steady, non-surging flow from start to finish.
A stable flow ensures:
- Consistent wall contact
- Proper compression of the ball
- Lower risk of hang-ups at reducers and elbows
- Predictable movement through vertical or curved sections
Avoid sudden throttle changes, fast-start bursts, or pump surges—they can shove the ball sideways against weld lips or gasket edges.
Reading the Line: Indicators to Watch
- Rising pressure at bends or reducers
→ Slow slightly. A spike means the ball is fighting geometry or encountering residue buildup. - Skipping or jerky movement
→ Often caused by a ball that’s too small or too hard, limiting wall contact.
Size and hardness adjustment guidance:
https://www.kinsoe.com/sponge-ball-sizing-guide/
https://www.kinsoe.com/sponge-ball-materials-hardness/ - Uneven wipe quality
→ Consider switching to the two-ball method or increasing oversize within safe limits.
Recommended Mediums
- Clean water is the standard flush medium.
- If additives are permitted onsite (varies by region and contractor), they must be:
- Non-foaming
- Non-corrosive
- Safe for gaskets, clamps, and pumps
When in doubt, stick with clean water to ensure predictable ball behavior and safe discharge.
Flow Rate Targets (General Guidance)
- Too fast: Can wedge the ball into elbows or reducers
- Too slow: Reduces wiping energy and may allow slurry to bypass
- Ideal: A steady flow that keeps the ball moving continuously without pressure spikes
For systems with long vertical rises or multiple bends, flow should be increased gradually, allowing the ball to seat and compress properly at each transition.
Operator–Spotter Communication
Clear communication is essential. The spotter should call out:
- Ball movement speed
- Pressure tone changes
- Any abnormal vibration or hesitation in the line
- Discharge confirmation
A coordinated team avoids surges and ensures a safe, efficient cleanout.
Special Line Elements (Reducers, Elbows, Long Hoses)
Concrete pump lines almost always include geometry that changes how a sponge ball moves. These areas demand more attention because they influence ball size, hardness selection, and flow control.
Reducers — Highest-Risk Location
Reducers are the most common point for a ball to slow down, wedge, or stall.
Why?
- Sudden drop in I.D.
- Internal lips from worn or misaligned fittings
- Sharp transitions or metal edges
- Build-up of dried slurry at reducer entry
Best Practices:
- Choose Soft hardness whenever reducers are tight or numerous.
- Keep diameter within recommended oversize, but prioritize softening before downsizing.
- Inspect internal lips—many recurring stalls are caused by a mechanical issue, not the ball.
Elbows & Tight Radii
Elbows change direction and introduce friction. The tighter the radius, the more compression the ball must achieve.
What happens:
- Ball may slow or “thump” as it rotates and reorients
- Hard balls can wedge or skip
- Oversize becomes more sensitive to flow speed
Best Practices:
- Maintain steady flow (avoid surges).
- Use Soft/Open-Cell balls for easier navigation.
- For wiping issues, increase oversize modestly—but stay within passable limits.
Long Flexible Hoses
Long hoses can ovalize, especially when suspended or curved, effectively reducing the internal diameter in certain sections.
Challenges:
- Reduced I.D. at bends
- Increased friction
- Greater chance of inconsistent wipe
Best Practices:
- Prefer Open-Cell Rubber for maximum compression and rebound.
- Keep oversize but avoid hard balls unless the route is very straight.
- Reduce flow slightly at sections known to have heavy sag or curvature.
Link to hardness & material behaviors:
https://www.kinsoe.com/sponge-ball-materials-hardness/
Mixed Hose + Steel Pipe Routes
This combination is common in pump trucks.
Why it matters:
- Steel offers consistent I.D.
- Hoses may shrink, stretch, or ovalize
- Transitions between materials create friction changes
Best Practices:
- Size according to the tightest measured I.D.
- Use Soft hardness as the default for mixed material routes
- Monitor movement at the transition points
Post-Clean Checks & Documentation
A proper cleanout doesn’t end when the sponge ball exits the discharge. The post-clean inspection ensures the line is ready for the next shift and helps you improve future cleaning efficiency by understanding how the ball performed.
1. Inspect the Discharge Output
After the ball exits, check the water flow:
- Clear water with minimal fines → Successful cleaning
- Cloudy water or visible slurry → Consider
- Increasing oversize slightly
- Switching to Medium hardness
- Using the two-ball method next time
- Reviewing reducers/elbows for buildup
If residue keeps appearing after several liters of water, revisit ball selection:
https://www.kinsoe.com/sponge-ball-sizing-guide/
2. Examine the Sponge Ball
A quick condition check tells you a lot about your pipeline:
- Heavy wear on one side → Pipe erosion or misaligned reducers
- Deep cuts or tears → Sharp internal lips or weld beads
- Flattening or slow rebound → Ball overheated or over-compressed
- Minimal wear but poor cleaning → Ball may be too small or too hard
If wear is excessive, consider PU or adjust hardness:
https://www.kinsoe.com/sponge-ball-materials-hardness/
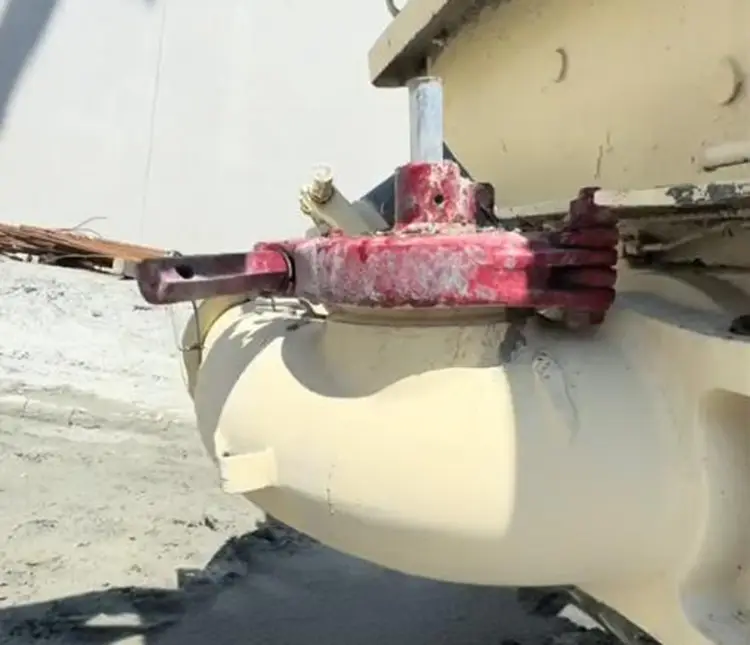
3. Inspect Clamps, Gaskets & Fittings
Look for:
- Loose or misaligned clamps
- Torn or improperly seated gaskets
- Weld beads or edges that may have scraped the ball
- Residue buildup inside the reducer entry
Fixing one damaged clamp or grinding a sharp lip can prevent multiple future jams.
4. Record Your Cleaning Parameters
Good documentation makes your next clean faster and safer. Record:
- Ball size & hardness
- Material (Rubber vs. PU)
- Water volume used
- Pump speed / flow behavior
- Total cleanout time
- Any hesitations or pressure changes
- Locations of reducers or elbows that caused slowdowns
This becomes your crew’s reference sheet for repeatability.
5. Stock Spare Balls & Plan Ahead
Always keep:
- 2–3 extra balls of the same size/hardness
- 1 size up and 1 size down
- Soft and Medium variants for flexibility
- A note showing minimum I.D. from the tightest reducer
This prevents downtime when a line behaves differently than expected.

Quick Troubleshooting (Skimmable)
Concrete pump lines can behave differently day to day depending on temperature, hose condition, residue load, and reducer alignment. Use this quick-reference list to diagnose the most common cleaning issues fast.
Ball Stuck or Slowing at a Reducer
Likely Causes:
- Ball is too hard
- Oversize is at the upper limit for your geometry
- Internal lip, misaligned gasket, or weld bead
- Flow too fast entering the reducer
Fix Sequence (in order):
- Soften hardness (Soft → solves most reducer hang-ups)
- Reduce diameter slightly while staying oversized vs I.D.
- Inspect reducer for internal lips, edges, or buildup
- Repeat with steady, slower flow at reducer entry
Full guide:
https://www.kinsoe.com/sponge-ball-troubleshooting/
Poor Cleaning / Slurry Still Present
Likely Causes:
- Ball is too small
- Hardness too low for residue level
- Water slug too short (for boom pumps)
- Inconsistent flow or surging
Fixes:
- Increase oversize within safe limits
- Step up to Medium hardness
- Use the two-ball method for deeper cleaning
- Ensure constant, non-surging flow
Excessive Wear or Ball Damage
Likely Causes:
- Rough steel pipe, weld beads, or sharp reducer edges
- Ball hardness not matched to geometry
- Very abrasive fines in the slurry
Fixes:
- Switch to PU Medium for improved abrasion resistance
- Grind or repair sharp edges in reducers/elbows
- Reduce pump speed through rough sections
Troubleshooting table:
https://www.kinsoe.com/sponge-ball-troubleshooting/
Ball Moves Too Fast / Skips
Likely Causes:
- Oversize too small → weak wall contact
- Hardness too high → insufficient compression
- Flow too high
Fixes:
- Increase ball oversize in next cycle
- Step down hardness to Soft
- Maintain steady, moderate flow rate
What This Article Doesn’t Cover (and Where to Go)
This guide focuses on cleaning methods, steps, and safety—but several related topics require more detailed explanations that are covered in other articles in this series. Use the links below to explore deeper technical guidance.
1. Exact Sizing Rules
How big should the sponge ball be relative to the pipe’s actual I.D.?
What oversize percentage should you use for Soft vs. Medium vs. Hard?
Sizing is critical for safe passability and proper wiping.
👉 Full guide:
Sizing Guide — How to Size Sponge Cleaning Balls
https://www.kinsoe.com/sponge-ball-sizing-guide/
2. Material, Cell Structure & Hardness Choices
Rubber vs. PU?
Open-cell vs. closed-cell?
Soft, Medium, or Hard?
These choices directly influence wiping power, passability, and lifespan.
👉 Detailed comparison:
Materials & Hardness — Rubber vs. PU, Open- vs. Closed-Cell
https://www.kinsoe.com/sponge-ball-materials-hardness/
3. Durability, Temperature & Reuse Limits
How many cycles can a ball handle?
What affects wear rate?
How does temperature influence rebound and life?
👉 Lifespan & care guide:
Temperature & Reuse — When to Replace Cleaning Balls
https://www.kinsoe.com/sponge-ball-temperature-reuse/
For a complete understanding of sponge cleaning ball selection, sizing, and application, start with the main pillar page:
👉 Sponge Cleaning Balls: Fast Buyer’s Overview
https://www.kinsoe.com/sponge-cleaning-balls-fast-buyers-guide/
CTA — Get the Right Sponge Ball for Your Concrete Pump Line
Choosing the correct size, hardness, and material is the key to a smooth, safe, and effective concrete pump line cleanout. If you want a tailored recommendation for your specific line setup, just share the following:
- Actual I.D. measured at pipes, hoses, reducers, and elbows
- Line length & route (straight, boom, vertical sections, mixed hose + steel)
- Residue level (light, moderate, heavy)
- Preferred cleaning method (single-ball or two-ball)
With this information, we’ll recommend the ideal diameter + hardness + cell structure for your next cleanout.
Ready to order Sponge Cleaning Balls?
Explore our product page:
👉 Sponge Cleaning Balls (Kinsoe Rubber)
https://www.kinsoe.com/product/rubber-sponge-cleaning-balls/
New to this topic? Start with the main pillar:
👉 Sponge Cleaning Balls: Fast Buyer’s Overview
https://www.kinsoe.com/sponge-cleaning-balls-fast-buyers-guide/
Useful Related Articles:
- Sizing Guide → https://www.kinsoe.com/sponge-ball-sizing-guide/
- Materials & Hardness → https://www.kinsoe.com/sponge-ball-materials-hardness/
- Troubleshooting → https://www.kinsoe.com/sponge-ball-troubleshooting/
FAQ
Is the two-ball method always better?
No. The two-ball method is ideal for long booms, vertical lines, and heavy residue, but it’s unnecessary for short, straight runs. For routine end-of-shift cleaning, the single-ball method is usually sufficient.
If pressure spikes at a reducer, what should I do?
- Slow the flow immediately
- Switch to a softer ball on the next cleanout
- Inspect the reducer for internal lips, misaligned clamps, or buildup
- If the issue repeats, review the full stuck-ball checklist:
https://www.kinsoe.com/sponge-ball-troubleshooting/
Can I reuse sponge cleaning balls?
Yes—provided the ball still rebounds properly and shows no deep cuts, tears, or glazing. Lifespan depends on temperature, pipe condition, residue type, and material (PU lasts longer).
Learn more here:
Temperature & Reuse: https://www.kinsoe.com/sponge-ball-temperature-reuse/