
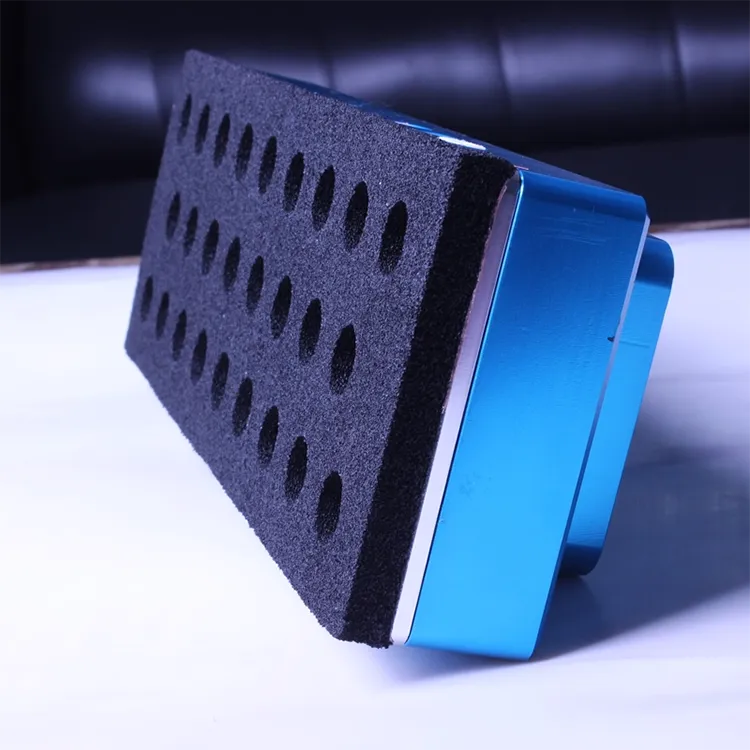
Foam suction cups are designed to grip the surfaces that rubber cups struggle with—rough cartons, porous MDF, textured plastics, and oily machined parts. But when something goes wrong, the symptoms can look confusing: dropping parts, slow pick-up, marking, or the vacuum generator running hot.
The good news?
More than 90% of foam suction cup failures come from adjustable factors—NOT product defects.
In this troubleshooting guide, I’ll help you diagnose issues step-by-step based on symptoms you can see directly on your production line.
For more complete understanding, you may also refer to:
- Foam Suction Cups: Complete Buyer’s Guide
- How to Select the Right Foam Suction Cups
- Foam Suction Cups for Rough and Oily Surfaces
- Foam Suction Cup Life, Maintenance and Cost
- Foam vs Rubber Suction Cups: Material Guide
1. Introduction
If you’re used to working with rubber suction cups, switching to foam requires a mindset shift. Rubber cups depend on:
Tight sealing + deep vacuum.
Foam suction cups, however, operate on:
Controlled leakage + high airflow.
This means the core failure mechanisms are different:
- Increasing vacuum level won’t fix a foam cup—vacuum flow will.
- Foam cups tolerate dust but require correct hardness.
- Foam cups seal rough surfaces but need proper diameter and material.
- Rubber-cup troubleshooting habits lead to incorrect adjustments.
Understanding these principles is the key to fixing 80% of foam cup issues immediately.
2. Symptom 1 — Parts Dropping or Slipping
This is the most common troubleshooting request I receive:
“The foam cups can pick up lightweight items, but heavier or porous materials are slipping.”
or
“The cups grip well in the morning, but drop parts later in the shift.”
Below are the real engineering causes—and how to fix them.
2.1 Probable Causes
1) Cup diameter too small
Rough and porous surfaces leak more; a small cup cannot compensate.
(See sizing rules in How to Select the Right Foam Suction Cups.)
2) Foam hardness too high
Hard foam = poor surface adaptability.
Result: micro-leaks → unstable grip.
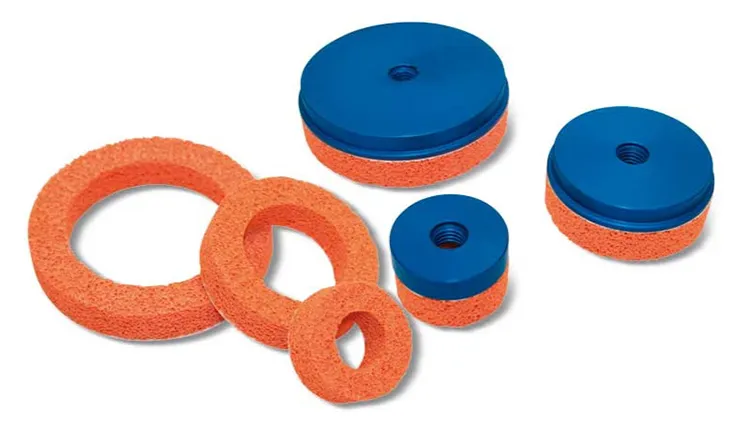
3) Material mismatch
Examples:
- Oily parts → require NBR foam
- Abrasive surfaces → require PU foam
- Delicate surfaces → require silicone foam
See comparison in Foam vs Rubber Suction Cups: Material Guide.
4) Insufficient vacuum flow (most common issue)
Using a deep-vacuum system meant for rubber cups is one of the biggest root causes of foam cup failure.
Foam cups require:
High flow, stable airflow, fast response.
5) Surface leakage from rough/porous textures
Corrugated cartons, MDF, textured plastic, and sandblasted metal cause natural leakage.
See real-world examples in:
Foam Suction Cups for Rough and Oily Surfaces.
6) Foam wear or contamination
Dust, oil, ink, fibers, and edge cracks drastically reduce sealing performance.
(See wear patterns in Foam Suction Cup Life, Maintenance and Cost.)
2.2 Diagnostic Procedure (The Quick Tests I Use on Customer Lines)
Step 1 — Press the cup on the product
Check how the foam deforms.
- Uneven compression → foam too hard
- Excessive collapse → worn foam or too soft
Step 2 — Test with a larger cup
If performance improves immediately, your original diameter was too small.
Step 3 — Inspect the foam surface
Look for:
- Cracks
- Dust
- Oil film
- Surface tearing
- Compression set
Step 4 — Check vacuum response time
Slow response?
Your hose length, ID, or manifold design is the problem—not the cup.
Step 5 — Evaluate vacuum flow
Measure actual airflow under load.
High vacuum level with low flow ≠ stable holding force.
2.3 Corrective Actions (Proven Solutions)
1) Increase cup diameter (20% oversize rule)
Especially for porous and dusty surfaces.
2) Switch to softer or fine-cell foam
Improves sealing on:
- Rough cartons
- MDF
- Textured plastics
- Curved shapes
3) Select the correct foam material
- NBR → oily parts
- PU → abrasive surfaces
- Silicone → glossy or delicate surfaces
- NR/EPDM → general use
4) Increase vacuum flow, not vacuum level
Upgrade to:
- High-flow ejectors
- Larger flow paths
- Bigger manifold ID
5) Clean or replace filters
Clogged filters reduce flow and cause false drop-offs.
6) Replace worn foam cups
Foam is a consumable component; if cells collapse, sealing cannot recover.
➡ Recommended follow-up:
For deeper insights about surface behaviors, see Foam Suction Cups for Rough and Oily Surfaces.
3. Symptom 2 — Slow Pick-Up or Slow Release
If your cups eventually grip or release but take too long, the problem is almost always in the vacuum delivery path, not the cup material.
Here’s how I diagnose and solve it.
3.1 Probable Causes
1) Vacuum flow is too low
Foam suction cups leak by design—slow flow = slow activation.
2) Hose length too long or internal diameter too small
Long, narrow hoses act like bottlenecks.
3) Foam compression set
If the foam stays flattened, its rebound speed slows, delaying release.
See durability info in:
Foam Suction Cup Life, Maintenance and Cost.
4) Manifold imbalance
Uneven distribution = some cups starve while others overdraw flow.
5) Filters partially clogged
Small dust accumulation ≠ small problem.
It only takes 10–20% blockage to slow pick-up noticeably.
3.2 Diagnostic Procedure
Test 1 — Direct connection test
Connect one cup directly to the vacuum source.
If speed improves → the issue is hoses or manifold.
Test 2 — Check hose length / ID
Rule of thumb:
- Keep hoses short
- Use large ID
- Avoid sharp bends or tees
Test 3 — Inspect foam rebound
Press the foam and observe its return time.
If sluggish → foam is worn.
Test 4 — Check vacuum generator flow under load
Measure actual flow with cups connected.
High vacuum level alone means nothing if flow is restricted.
3.3 Corrective Actions
1) Increase vacuum flow
Use larger ejectors or adjust flow settings.
2) Shorten hoses / increase internal diameter
This is one of the fastest, easiest upgrades.
3) Replace cups with compression set
Flattened foam = slow sealing and slow release.
4) Re-balance the manifold
Use flow restrictors or re-route hoses for even distribution.
5) Clean or replace filters
In dusty or oily environments, filters can clog in just a few days.
➡ For environmental-specific optimization, refer to Foam Suction Cups for Rough and Oily Surfaces.
4. Symptom 3 — Visible Marks, Scuffs, or Damage on the Product
Foam suction cups are chosen specifically because they handle delicate or coated surfaces better than rubber cups.
So when a customer tells me:
- “The foam cups are leaving marks,”
- “My printed labels have slight impressions after gripping,” or
- “Glossy plastic has surface blemishes,”
…it’s a sign that the material, hardness, or vacuum parameters are mismatched to the product.
4.1 Probable Causes
1) Foam hardness is too high
Hard foam can compress too aggressively and leave visible impressions, especially on:
- Printed surfaces
- Glossy plastics
- Coated metals
- Decorative panels
See selection rules in How to Select the Right Foam Suction Cups.
2) Wrong material for sensitive surfaces
Some foams are more abrasive or leave slight texture transfer.
- NR foam → not ideal for sensitive coatings
- PU foam → durable but firmer; may mark glossy surfaces
- Silicone foam → safest for delicate finishes
Material comparison available in
Foam vs Rubber Suction Cups: Material Guide.
3) Excessive vacuum level
Too much compression = marking, deformation, or “ring” impressions.
Foam cups need higher airflow, not stronger vacuum.
4) Uneven compression or edge wear
Worn edges compress unevenly and cause imprint marks.
(See wear patterns in Foam Suction Cup Life, Maintenance and Cost.)
4.2 Diagnostic Procedure
Step 1 — Examine the mark pattern
- Ring-shaped mark → vacuum too strong
- Edge impressions → foam too hard or worn
- Texture transfer → foam material too firm
Step 2 — Compare with softer foam
Switch temporarily to soft or silicone foam for a quick test.
If marks disappear → hardness issue confirmed.
Step 3 — Reduce vacuum level
Reduce vacuum by 10–20% and observe marking changes.
Step 4 — Inspect foam edges
Cracked or compressed edges can cause “cut marks.”
4.3 Corrective Actions
1) Switch to ultra-soft or silicone foam
Best choice for:
- Glossy plastics
- Coated metals
- Glass
- Premium packaging
2) Reduce vacuum level and increase flow
This produces a gentler grip without sacrificing holding force.
3) Increase foam thickness
Thicker foam distributes compression more evenly.
4) Replace worn cups
If edges are damaged, marking will continue.
➡ For surface-specific recommendations, see
Foam Suction Cups for Rough and Oily Surfaces.
5. Symptom 4 — Vacuum Generator Running Hot, Loud, or Overloaded
When the vacuum generator “sounds stressed” or heats up abnormally, customers usually think the cup is defective.
But almost always, the real causes are:
- Leakage from worn foam
- Clogged filters
- Incorrect vacuum type
- Oversized leakage due to surface characteristics
This section helps you pinpoint the root cause quickly.
5.1 Probable Causes
1) Excessive leakage due to wrong foam hardness
If the foam cannot seal rough/porous surfaces, the vacuum generator compensates by working harder—overheating in the process.
2) Micro-tears or worn edges
Small tears = extra airflow loss = generator overload.
(See durability notes in
Foam Suction Cup Life, Maintenance and Cost.)
3) Filter clogging
Dust, MDF fibers, ink, or oil accumulation restrict airflow.
A 20–30% blockage is enough to push the vacuum generator beyond its duty cycle.
4) Wrong vacuum generator type
Using a deep-vacuum generator (designed for rubber cups) in a foam-cup environment leads to:
- Overheating
- Longer cycle times
- Unstable vacuum levels
Foam requires high-flow ejectors or pumps, not deep vacuum.
5) Manifold design issues
Uneven flow distribution forces the generator to compensate.
5.2 Diagnostic Procedure
Test 1 — Inspect foam edges and surface
Tears or cracks increase leakage dramatically.
Test 2 — Check filters for contamination
Tap filters gently—if dust or oil falls out, it’s time to replace.
Test 3 — Measure generator duty cycle
If the generator rarely reaches idle, it’s overworking.
Test 4 — Temporarily switch to a high-flow vacuum source
If the generator stabilizes, your existing vacuum type is inadequate.
5.3 Corrective Actions
1) Replace worn or cracked foam cups
Immediate reduction in leakage.
2) Add or upgrade filtration
For dusty environments, use:
- Fine filters
- Pre-filters
- Cyclone dust separators
For oily environments:
- Oil-resistant filters
- Drip separators
3) Increase vacuum flow capacity
Switch to ejectors or pumps designed for porous materials.
4) Optimize foam hardness/material
- Soft foam for sealing rough surfaces
- NBR foam for oily parts
- PU foam for dusty or abrasive surfaces
Material selection guide:
Foam vs Rubber Suction Cups: Material Guide.
5) Improve manifold balance
Use larger-diameter manifolds or individual valves to avoid flow starvation.
6. Troubleshooting Flows
These decision trees are designed for fast on-site diagnosis when cycle time or uptime is critical.
6.1 If the Cup Is NOT Sealing Properly
- Check foam hardness
- Check cup diameter
- Increase airflow
- Inspect foam wear
- Check hoses & manifolds
- Review filter condition
- Match material to surface type
➡ Related content:
How to Select the Right Foam Suction Cups
6.2 If the Product Slips During Motion
- Switch to softer foam
- Increase cup diameter
- Increase airflow
- Switch to correct material (NBR, PU, etc.)
- Reduce vacuum level for delicate surfaces
➡ Surface-specific guidance:
Foam Suction Cups for Rough and Oily Surfaces
6.3 If the Cup Damages the Surface
- Switch to silicone or ultra-soft foam
- Reduce vacuum level
- Increase foam thickness
- Check for edge wear
➡ Material selection:
Foam vs Rubber Suction Cups: Material Guide
6.4 If the Vacuum Generator Overheats
- Inspect filters
- Check foam for tears
- Increase airflow
- Evaluate vacuum generator type
- Check hose lengths & manifold balance
➡ Durability & cost guidance:
Foam Suction Cup Life, Maintenance and Cost
7. How to Prevent Problems Before They Start
After supporting so many automation teams, I’ve realized that most foam suction cup failures are predictable—and preventable.
If you implement the following preventive measures, you will eliminate 70–85% of common issues before they ever occur.
This chapter summarizes the exact routine I coach my clients to follow.
7.1 Correct Cup Selection (The #1 Preventive Measure)
Incorrect cup selection is responsible for the majority of problems:
- Wrong hardness → sealing failures
- Wrong material → premature wear
- Wrong thickness → uneven compression
- Wrong diameter → insufficient sealing margin
Use the rules in How to Select the Right Foam Suction Cups to make sure your foundation is right.
And if you’re unsure, send me photos and surface information—I can usually identify the correct hardness/material within minutes.
7.2 Regular Surface Assessment
Foam suction cup performance is tied directly to your product’s surface condition.
I always inspect for:
- Porosity
- Grooves or texture
- Dust or wood fibers
- Oil film
- Height variations
If you’re working with challenging surfaces, review the engineering tips in
Foam Suction Cups for Rough and Oily Surfaces.
7.3 Proper Vacuum System Setup
Foam cups require high airflow, not deep vacuum.
Best practices:
- Use high-flow ejectors or pumps
- Keep hoses short and with large internal diameter
- Use balanced manifolds across multiple cups
- Use proper filtration (dust or oil type)
Incorrect vacuum systems are one of the leading causes of slow pick-up and generator overheating.
See vacuum optimization recommendations in
Foam Suction Cups for Rough and Oily Surfaces.
7.4 Predictive Maintenance Routine
Instead of using fixed replacement intervals, I recommend:
“Replace the cup when performance changes—not when the calendar says so.”
Indicators that signal an upcoming failure:
- Foam rebounds slowly
- Edge cracks appear
- Pick-up speed decreases
- Generator noise increases
- Parts shift slightly before lifting
Detailed wear patterns and replacement timing are covered in
Foam Suction Cup Life, Maintenance and Cost.
8. Quick Troubleshooting Checklist
This is the summary I provide to engineers for on-site, real-time use.
You can print this as a 1-page reference near your production line.
□ Is the cup diameter too small?
Apply the 20% oversize rule from
How to Select the Right Foam Suction Cups.
□ Is the foam hardness appropriate for the surface?
- Rough → medium–soft
- Porous → soft + high flow
- Oily → NBR
- Abrasive → PU
See material guidance from
Foam vs Rubber Suction Cups: Material Guide.
□ Is the material suitable for the environment?
Check for oil, dust, heat, or abrasive conditions.
□ Is vacuum flow too low?
Foam suction cups need airflow, not deep vacuum.
□ Are hoses too long or too narrow?
Short + large ID = faster response.
□ Is the foam worn, torn, or contaminated?
Dust and oil reduce sealing performance significantly.
See wear patterns in
Foam Suction Cup Life, Maintenance and Cost.
□ Are filters clogged?
Dirty filters = slow pick-up + generator overload.
□ Is the surface oily, dusty, or highly porous?
Surface-adjusted engineering guidance available in
Foam Suction Cups for Rough and Oily Surfaces.
Conclusion
Foam suction cups are engineered to solve problems that rubber cups simply can’t—but they must be treated as part of a system, not as isolated components. As this troubleshooting guide has shown, when issues like drop-offs, slow pick-up, surface marking, or vacuum generator overload appear, the root cause is rarely a “bad cup.”
In practice, over 90% of failures come from adjustable factors:
- Cup diameter, hardness, or material mismatches
- Insufficient vacuum flow (not vacuum level)
- Hose length, manifold imbalance, or filter clogging
- Foam wear, contamination, or compression set
- Surface characteristics not accounted for in the original design
The most important mindset shift is this:
Foam suction cups work by controlled leakage and high airflow.
Trying to fix foam-cup problems with rubber-cup logic almost always leads to the wrong adjustments.
By following the diagnostic steps, corrective actions, and preventive routines outlined in this article, you can systematically identify the real cause, stabilize your process, and eliminate recurring downtime. In many cases, small changes—like increasing cup diameter, switching foam hardness, improving airflow, or replacing worn cups—solve problems immediately.
When Standard Solutions Aren’t Enough
Every production line is different. Surface textures, contamination levels, temperatures, cycle speeds, and load dynamics all influence suction performance. If your application falls outside “typical” conditions, custom foam suction cups are often the most reliable long-term solution.
If you need help selecting, optimizing, or customizing foam suction cups for your application, you can find detailed specifications and request support here:
👉 https://www.kinsoe.com/product/custom-foam-suction-cups/
In automation, stability is everything. The right foam suction cup—properly selected and correctly integrated—doesn’t just hold parts better; it keeps your entire line running smoothly.