
I. Introduction
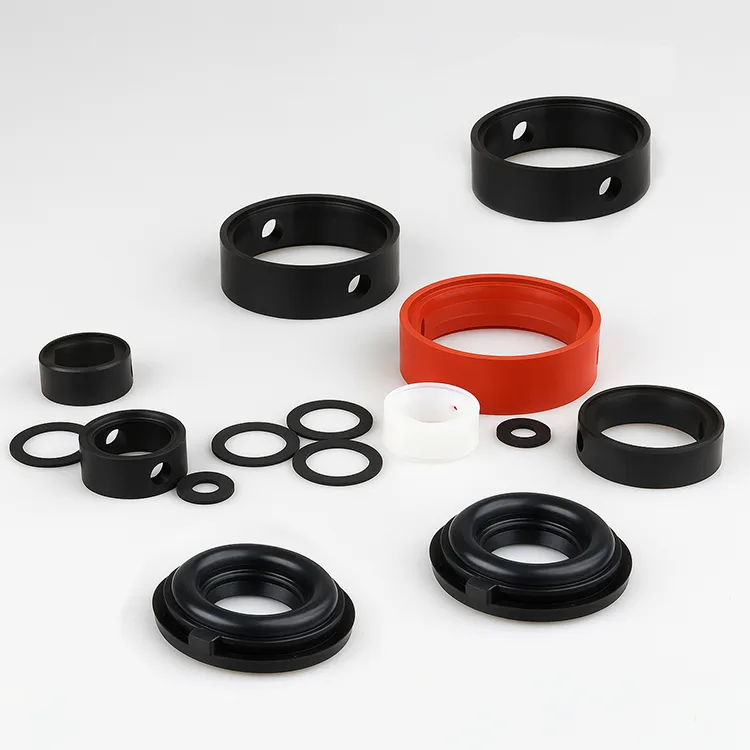
Rubber parts are everywhere—from the gaskets sealing car engines to the vibration dampers inside our washing machines. And behind nearly every one of these components lies a carefully chosen molding process. Rubber molding is not just a manufacturing technique—it’s the foundation that gives rubber its final shape, strength, and durability.
What makes rubber molding so essential? It all starts with vulcanization. This transformative process turns raw, flexible rubber into resilient, functional parts that can endure heat, pressure, wear, and chemicals. But the way this transformation happens varies greatly depending on the molding method used.
In this blog, I want to walk you through six major processes used to form custom rubber parts. Each one has unique strengths—and specific limitations. As a manufacturer deeply involved in both extrusion and molding, I’ve seen how choosing the right process can make the difference between a reliable product and a costly failure.
By the end of this article, you’ll understand not just what each molding process is, but when—and why—it should be used. Whether you’re an engineer designing a complex gasket, a product manager sourcing for production, or a buyer evaluating quotes from suppliers, this guide will help you make informed, confident decisions.
Let’s start with a quick overview of what rubber molding really means, and what factors you need to consider when selecting a process.
II. Overview of Rubber Molding Technology
2.1 What Is Rubber Molding?
Rubber molding is the process of shaping raw or compounded rubber into a final, functional form by applying heat and pressure inside a mold. But before we dive into the technicalities, let’s clarify something: molding and forming aren’t quite the same.
Molding typically involves placing rubber into a closed mold cavity where it undergoes vulcanization—a chemical reaction (usually with sulfur or peroxide) that cross-links the rubber’s molecular chains. This reaction is what transforms soft, tacky rubber into a tough, elastic, and durable material that holds its shape under stress, heat, and time.
Forming, on the other hand, may refer to shaping rubber without a closed mold—like extrusion or calendering. These methods still require vulcanization, but the shaping happens before the curing stage.
2.2 Key Considerations in Process Selection
Choosing the right rubber molding process isn’t just about budget or machinery—it’s about making the part work as intended, for as long as it should. Here are four key factors I always consider:
- Product Geometry
Is the part simple or complex? Thin-walled or thick? Does it include metal inserts, undercuts, or fine details? - Performance Requirements
Will the part face chemicals, pressure, high temperatures, or constant movement? Different processes affect material behavior and precision. - Production Volume and Efficiency
Some methods like injection molding shine in high-volume production. Others, like compression molding, are better suited for low to medium batches. - Material Compatibility
Not all rubbers behave the same way in every process. For example, silicone flows well for injection, while high-durometer EPDM might be better in compression.
Understanding these fundamentals sets the stage for selecting from the six major rubber forming processes I’m about to introduce. Let’s dive in.
III. Six Common Rubber Molding/Forming Processes
3.1 Compression Molding
3.1.1 Working Principle
Compression molding is one of the oldest and most straightforward methods for making rubber parts. The process begins with a pre-measured amount of rubber, often shaped into a “preform,” placed directly into the open cavity of a heated mold. Once the mold is closed, pressure is applied—forcing the rubber to flow and fill the cavity as it cures under heat.
It’s like making a waffle: pour in the batter, close the iron, and apply heat and pressure. But in this case, the “batter” is unvulcanized rubber, and the final product is an industrial-grade component.
3.1.2 Key Features
- Low Tooling Cost
Because the mold structure is relatively simple and doesn’t require complex runner systems, initial costs are much lower than for injection molding. - Good for Thick or Bulky Parts
Compression molding excels at producing large or thick-walled rubber items that don’t require tight tolerances. - Handles Inserts Well
It’s easy to place metal inserts, mesh fabrics, or other components into the mold before closing, allowing for integrated part designs.
However, this method is slower and more labor-intensive than others. There’s also more flash (excess rubber around the part) that must be trimmed after molding.
3.1.3 Typical Applications
Compression molding is ideal for low- to medium-volume production where part complexity is moderate. I often recommend it for:
- Engine and HVAC seals
- Anti-vibration mounts for industrial equipment
- Large pads, gaskets, or bushings in construction and utility systems
It’s a versatile method and still widely used today, especially for parts where cost-effectiveness and durability are more important than extreme precision.
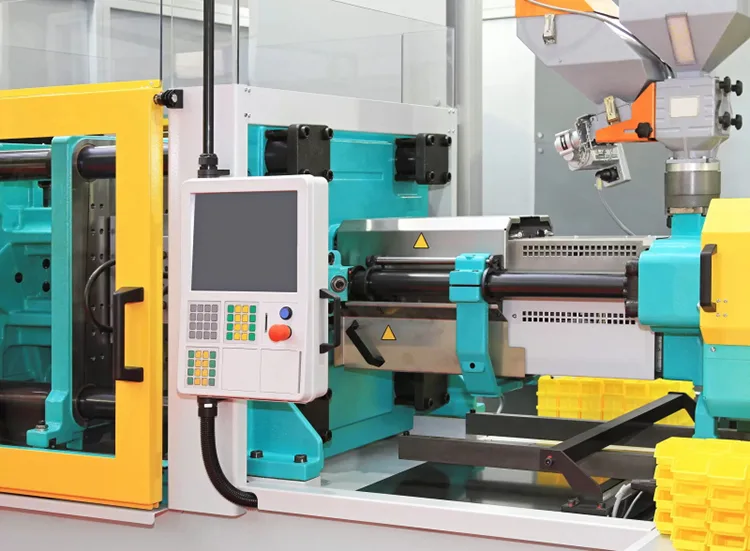
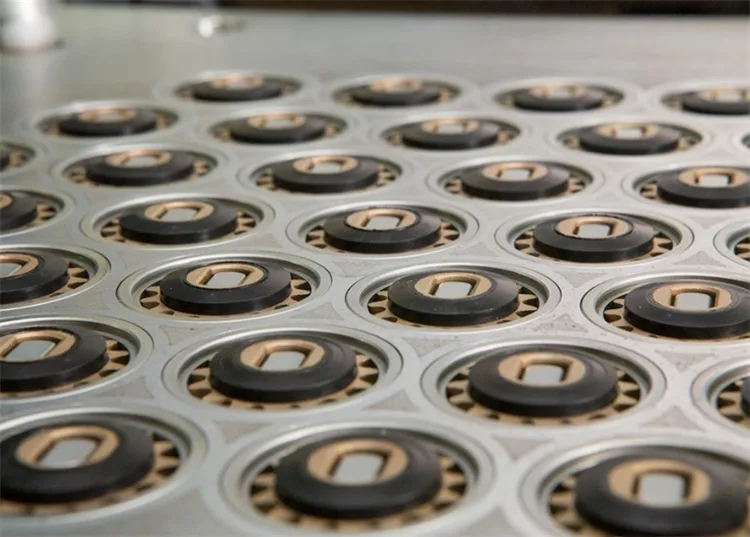
3.2 Injection Molding
3.2.1 Working Principle
Injection molding takes the rubber molding game to a whole new level of speed and precision. In this process, uncured rubber—typically in pellet or strip form—is first heated and plasticized in a barrel. Then it’s injected under high pressure into a closed mold cavity through a nozzle.
The mold stays tightly clamped during the entire curing cycle, ensuring that the rubber fills even the most intricate details. Once the part is cured, the mold opens automatically, and the finished part is ejected—ready for the next cycle.
If compression molding is like making waffles, then injection molding is like using an automatic pancake machine—fast, repeatable, and perfect for big orders.
3.2.2 Key Features
- High Efficiency and Automation
Injection molding can produce hundreds or thousands of parts per hour with minimal human intervention. - Superior Precision
Tight tolerances and detailed geometries are achievable, even with fine threads, grooves, or undercuts. - Low Waste, High Repeatability
Since material is metered precisely and flash is minimal, waste is reduced and consistency is excellent across batches. - Higher Initial Investment
Tooling is complex and costly, and machinery setup requires expertise—but the payback is well worth it for high-volume runs.
3.2.3 Typical Applications
I always recommend injection molding for complex or high-volume parts, especially those requiring excellent dimensional stability. It’s commonly used in:
- O-rings and precision sealing rings
- Automotive rubber components, like plugs and grommets
- Shoe soles and high-precision consumer rubber parts
If your goal is fast, repeatable production with minimal defects, injection molding is usually the best choice.
3.3 Transfer Molding
3.3.1 Working Principle
Transfer molding combines the simplicity of compression molding with some of the speed and control of injection molding. Here’s how it works: a pre-measured amount of rubber is loaded into a chamber called the transfer pot, located above the mold cavity. Once heated, the rubber is forced down through sprues and runners into the mold cavity using a plunger.
This method allows the material to fill the cavity more uniformly than compression molding—especially important for complex geometries or embedded components.
3.3.2 Key Features
- Great for Inserts and Complex Shapes
The design allows metal or fabric inserts to be precisely positioned in the mold, making it ideal for overmolded parts. - Less Flash, Better Finish
Because the flow is controlled through sprues, transfer molding generally creates cleaner parts with less flash than compression molding. - Moderate Tooling and Cycle Times
Tooling is more complex than compression molding but not as costly as injection molding. Cycle times fall somewhere in between the two. - Slight Material Waste
The transfer channels can cause some cured rubber waste, but it’s often acceptable for low- to medium-volume production.
3.3.3 Typical Applications
Transfer molding is a go-to for manufacturers when parts demand precision, consistency, and the integration of inserts. You’ll often find it used in:
- Electrical insulators
- Rubber-to-metal bonded parts like motor mounts or valve seals
- Connector boots and precision grommets in electronics or aerospace
For medium-complexity parts where design precision matters—and the volume isn’t large enough to justify full injection tooling—transfer molding hits a sweet spot.
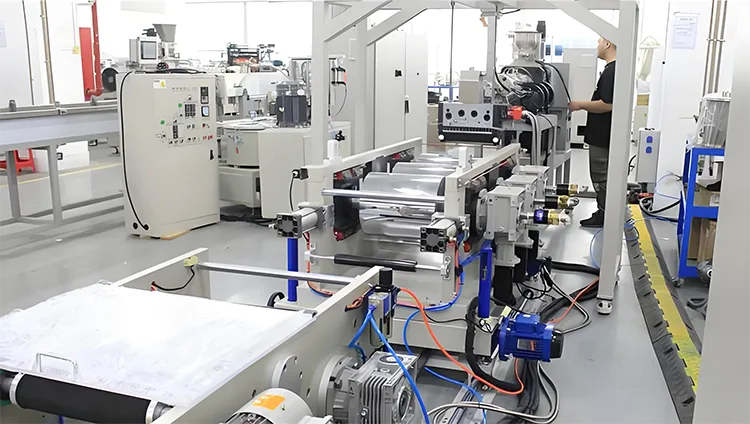
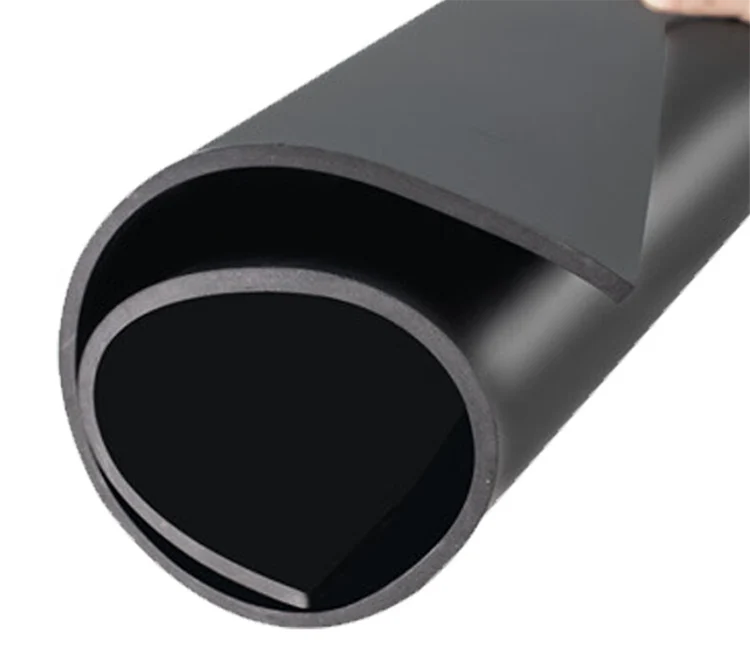
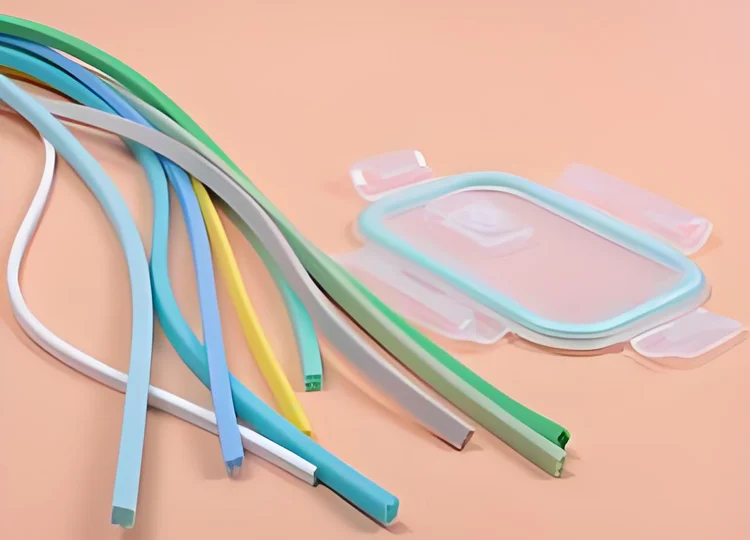
3.4 Extrusion
3.4.1 Working Principle
Extrusion is a continuous rubber forming process rather than a discrete molding method. In extrusion, uncured rubber is fed into a heated screw extruder, which pushes the material through a shaped die to create long, continuous profiles of a specific cross-section—think of it like squeezing toothpaste from a tube, but with precision dies and industrial scale.
Once extruded, the rubber still needs to be vulcanized. This usually happens in a continuous curing line—using hot air, salt bath, or microwave ovens, depending on the material.
3.4.2 Key Features
- Continuous Production
Perfect for making long parts without seams or joins—cut to any length. - Flexible Profile Design
Supports a wide range of cross-sectional geometries, including hollow, solid, or multi-chamber designs. - Requires Post-Curing
Unlike molding, extrusion doesn’t cure the rubber inside the die—it must be vulcanized afterward. - Excellent for Soft and Sponge Materials
Foam and sponge rubbers are commonly extruded for cushioning and insulation applications.
3.4.3 Typical Applications
Extrusion is one of our specialties at Kinsoe, especially for clients needing custom rubber sealing profiles. Typical applications include:
- Tubing for fluid or gas transfer
- Weatherstripping for doors, windows, and cabinets
- Hoses for automotive, HVAC, or chemical lines
- Edge trims and protective gaskets used in appliances and construction
For long, uniform rubber parts, extrusion is unmatched in efficiency and flexibility.
3.5 Calendering
3.5.1 Working Principle
Calendering is a process used to form rubber into thin sheets or to laminate rubber onto fabrics. It involves feeding uncured rubber through a series of heated, heavy-duty rollers that squeeze and stretch the material into precise thicknesses. These rollers can be adjusted to control both thickness and surface finish.
In some cases, fabric reinforcement layers—like polyester or nylon—are added during calendering to create rubber-fabric composites with improved strength and dimensional stability.
Unlike molding, calendering produces a flat, continuous sheet—ideal for large-surface applications and layered components.
3.5.2 Key Features
- Uniform Thickness Control
Calendering excels at delivering consistent thickness, even for ultra-thin sheets. - High-Speed and Scalable
It’s a continuous, high-throughput process, perfect for large-volume production. - Versatile Fabric Integration
Rubber can be bonded to one or more fabric plies, enabling mechanical strength, flexibility, and thermal resistance. - Requires Secondary Curing
Just like extrusion, calendered rubber must be vulcanized in a later stage to stabilize its final properties.
3.5.3 Typical Applications
I often recommend calendering when clients need large-area or sheet-form rubber materials, particularly when strength and uniformity matter. Typical applications include:
- Conveyor belts used in manufacturing, agriculture, and mining
- Tire cord fabrics for heavy-duty radial tires
- Waterproof membranes and liners in construction
- Electrical insulation sheeting
If your project requires flat rubber sheets or laminated structures, calendering delivers both scale and precision in a way few other processes can match.
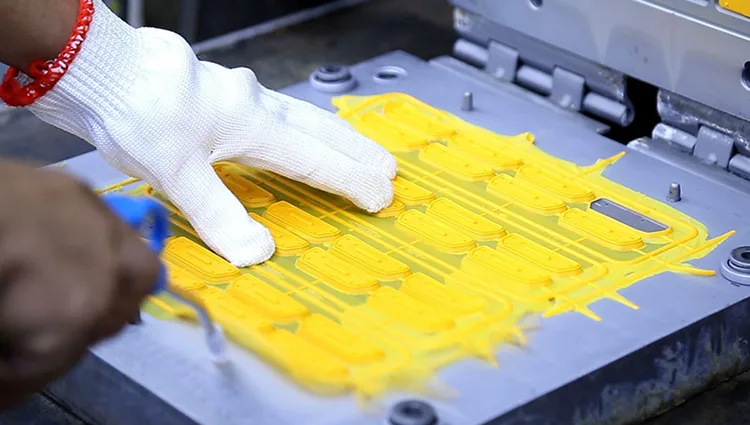
3.6 Casting
3.6.1 Working Principle
Casting is a unique method among rubber forming techniques because it doesn’t rely on high heat and pressure. Instead, it uses liquid rubber compounds—usually polyurethane or silicone—that are poured into an open or closed mold. The rubber then cures at room temperature or with mild heating, depending on the chemistry.
This process doesn’t involve mechanical force or shearing, which makes it ideal for parts that are large, soft, or have intricate internal shapes that might be damaged during traditional molding.
3.6.2 Key Features
- Simple and Low-Cost Tooling
Because no clamping pressure is needed, molds can be made from less expensive materials like plastic or resin. - Gentle on Complex or Delicate Designs
Since the rubber flows in a low-viscosity liquid form, it fills even fine details, threads, or undercuts with minimal stress. - Ideal for Soft, Flexible, or Large Parts
Parts that are too bulky or delicate for compression or injection molding often succeed in casting. - Longer Cure Times
Compared to heat-based molding, casting takes more time to cure—but this trade-off enables more flexible processing.
3.6.3 Typical Applications
I turn to casting when a client needs large parts, low-durometer rubbers, or small production runs without investing in costly steel molds. It’s ideal for:
- Polyurethane rollers and printer drums
- Protective linings for tanks or chutes
- Custom-molded molds and jigs
- Low-volume prototypes with high flexibility
Casting offers a unique balance: design freedom, soft material compatibility, and low tooling costs—especially beneficial during prototyping or when working with specialty elastomers.
IV. Comparative Analysis of the Six Processes
4.1 Production Efficiency and Cost
Each rubber molding or forming method brings its own balance between cost, speed, and scalability. Here’s how they compare:
| Process | Tooling Cost | Production Speed | Best for |
|---|---|---|---|
| Compression | Low | Moderate | Low/medium volume |
| Injection | High | Very High | High-volume runs |
| Transfer | Medium | Moderate | Precision + inserts |
| Extrusion | Medium | Very High | Continuous profiles |
| Calendering | Medium | High | Thin sheets/laminates |
| Casting | Very Low | Low | Prototyping, soft parts |
Injection molding stands out for automation and volume, while compression and casting remain budget-friendly for lower-scale production.
4.2 Application Suitability
Your part’s geometry, tolerance, and use case heavily influence the process selection.
- Complex shapes and tight tolerances → Injection or transfer molding
- Large or soft parts → Casting
- Long profiles or seamless lengths → Extrusion
- Flat sheets or textile laminates → Calendering
- Basic, thick, or insert-loaded parts → Compression molding
No single method is perfect for every part. It’s about aligning the process with your design intent and performance expectations.
4.3 Material Compatibility
Some rubbers behave better in certain processes:
| Rubber Type | Best-Suited Processes |
|---|---|
| Natural Rubber | Compression, Transfer, Calendering |
| EPDM | Compression, Extrusion, Calendering |
| Silicone | Injection, Transfer, Casting |
| Nitrile (NBR) | Compression, Injection |
| Polyurethane | Casting, Injection |
| Fluoroelastomers | Injection, Compression |
Always test material compatibility early in development. Even within one rubber family, additives and hardness can affect how well it processes.
V. How to Choose the Right Rubber Molding Process
5.1 Decision Framework
Choosing the best rubber molding process isn’t just about price or equipment—it’s about matching process capability to your product’s technical and business goals. Here’s a decision framework I often use with clients:
- Start with the Shape
- Is your part long and continuous? → Consider extrusion.
- Is it a flat sheet or laminated? → Go with calendering.
- Is it a 3D object with complex geometry? → Injection or transfer molding may be better.
- Evaluate Performance Requirements
- High-pressure sealing? → Precision from injection molding helps.
- Chemical resistance or flexibility? → Choose materials like silicone and pair with compatible processes.
- Check Volume and Budget
- Low-volume or prototyping? → Use compression or casting to avoid high tooling costs.
- High-volume runs? → Invest in injection molding for long-term efficiency.
- Think About Material Type
- Need sponge, soft, or foam rubber? → Extrusion or casting is better suited.
- Using reinforced fabric? → Calendering is required.
- Account for Insert or Multi-Material Needs
- If your part has embedded metal or multiple layers, transfer or compression molding offers better flexibility.
5.2 Case Examples
Here are a few real scenarios where we at Kinsoe helped customers match their part to the right process:
- Low-volume compression example
A customer from the construction industry needed large, thick EPDM gaskets for HVAC enclosures—around 2,000 pieces. We used compression molding, which kept tooling simple and allowed easy insert placement without needing complex runners. - High-volume injection example
An auto parts supplier needed 500,000 O-rings for fuel systems. We used injection molding to meet tight tolerances, fast cycle times, and automated inspection, significantly reducing per-unit cost. - Extrusion-based sealing strip production
A manufacturer of smart kitchen appliances requested continuous silicone sealing strips with fire resistance and food-grade properties. We used extrusion + hot-air vulcanization, delivering coiled rolls at high efficiency, ready for inline cutting and assembly.
These aren’t just technical choices—they’re strategic ones that affect cost, quality, and time-to-market.
VI. Conclusion
6.1 Summary of Key Points
Rubber molding is not a one-size-fits-all solution. Each process—compression, injection, transfer, extrusion, calendering, and casting—offers unique advantages depending on the product’s shape, complexity, material, and production scale.
- Compression molding is great for low-cost, thick, or insert-loaded parts.
- Injection molding shines in high-volume, high-precision applications.
- Transfer molding bridges precision and insert compatibility with moderate tooling.
- Extrusion delivers seamless, continuous profiles efficiently.
- Calendering is ideal for flat, reinforced sheets.
- Casting offers design flexibility for soft or oversized parts at low tooling cost.
There’s no “best” process universally—only the one that best fits your needs.
6.2 Final Advice for Engineers and Buyers
If you’re designing or sourcing a custom rubber part, don’t choose the molding method in isolation. Work closely with manufacturers like Kinsoe early in the design phase. Share your product drawings, material specs, and performance goals so we can recommend the most effective process.
And if you’re unsure, start with a prototype using a flexible, low-cost method like compression or casting before investing in production tooling. It’s the smartest way to avoid mistakes and ensure long-term performance.
The right molding process is not just a manufacturing decision—it’s a strategic one that can affect cost, reliability, and product success.