
I. Introduction
When it comes to labeling products efficiently and accurately, the humble sponge roller plays a much bigger role than most people think. In my early days working with labeling machine clients, I saw firsthand how a mismatched roller could throw off the entire labeling process—causing misalignment, tearing, bubbles, and even production line downtime.
The right sponge labeling roller can significantly improve label adhesion, reduce waste, and boost machine uptime. But the wrong choice? That can cost you time, money, and brand reputation. I’ve seen buyers struggle with issues like using overly hard rollers on delicate packaging or assuming all sponge rollers are the same.
In this guide, I want to share everything I’ve learned at Kinsoe about how to choose the right sponge labeling roller—so you can make informed decisions tailored to your specific machine and product needs.
II. Understanding the Role of Sponge Labeling Rollers
So, what exactly is a sponge labeling roller?
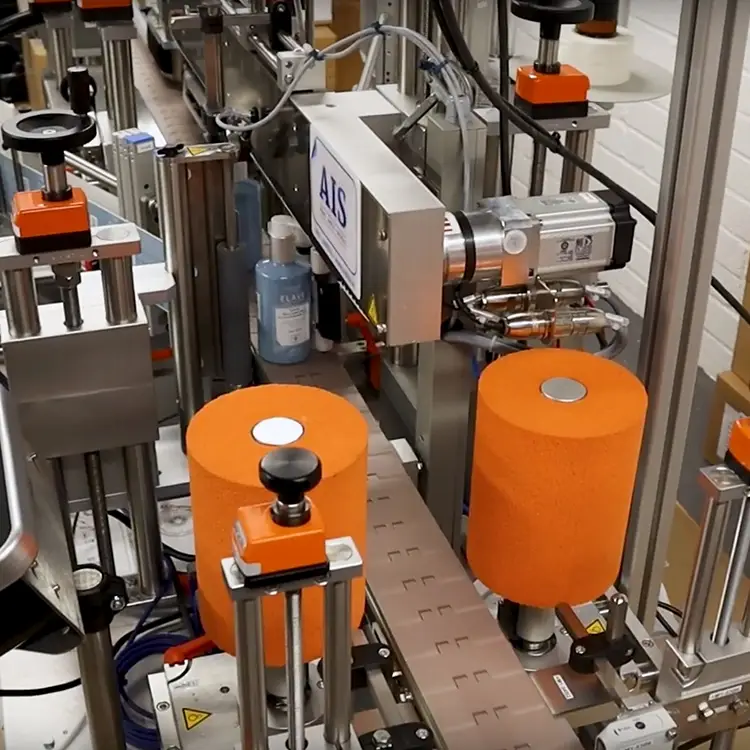
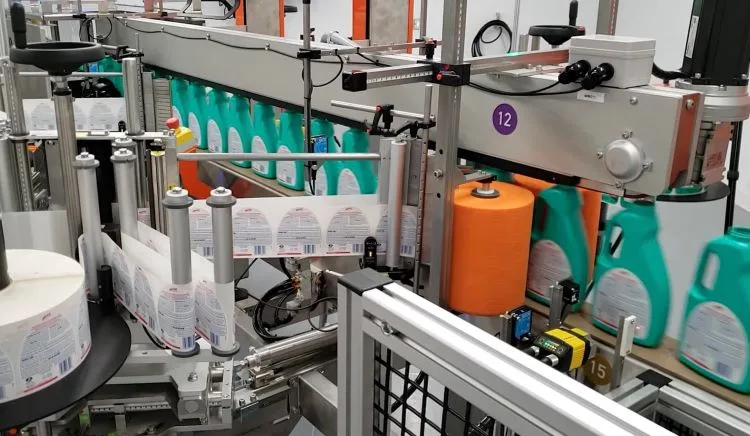
A sponge labeling roller is a cylindrical component made from compressible materials like rubber sponge or foam, designed to apply even pressure during the label transfer process. It sits within automatic or semi-automatic labeling machines and helps press the label onto the product surface as it moves along the production line.
The core function of the roller is pressure control—ensuring smooth adhesion without damaging the product or wrinkling the label. But its impact goes beyond that. A good sponge roller enhances label alignment, reduces static buildup, and improves appearance—especially for curved or uneven packaging.
From food bottles to cosmetic jars and pharma boxes, sponge rollers are the unsung heroes that help brands present a polished final product.
III. Key Selection Factors
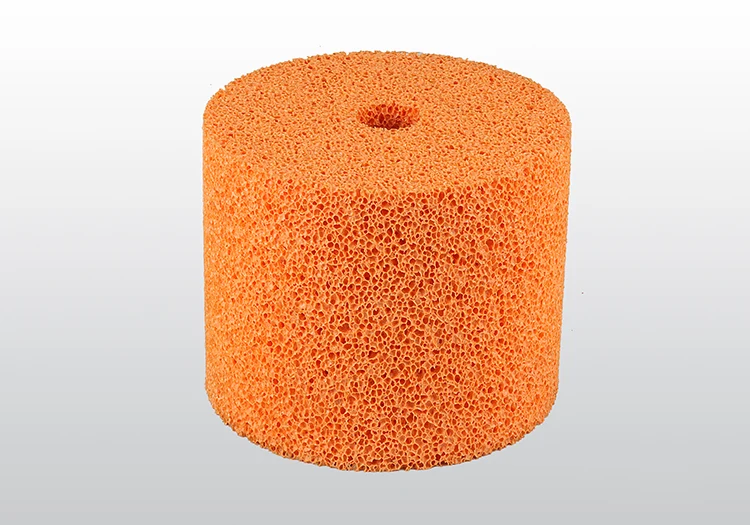
1. Material Type Matters
Not all sponge materials are created equal. The type of sponge used in your roller determines its durability, rebound, and suitability for specific environments.
- Natural Rubber Sponge: This is the most cost-effective option and widely used for general-purpose labeling. It offers excellent elasticity and quick recovery after compression, making it a solid choice for standard bottle labeling and packaging lines with moderate speed.
- Polyurethane (PU) Foam: PU foam is known for its abrasion resistance and longer lifespan. It maintains consistent compression and rebound, especially in higher-speed machines. If you’re labeling heavier items or running continuous shifts, this may be your best bet.
- Silicone Sponge: When dealing with high temperatures or requiring non-stick performance—such as in cleanrooms, heat shrink labelers, or pharmaceutical environments—silicone sponge rollers shine. They resist sticking and don’t degrade under heat or chemical exposure.
| Material | Elasticity | Temp Resistance | Wear Resistance | Cost | Use Cases |
|---|---|---|---|---|---|
| Natural Rubber | High | Moderate | Moderate | Low | General-purpose labeling |
| PU Foam | Good | Moderate | High | Medium | High-speed, durable applications |
| Silicone Sponge | Good | Excellent | Good | High | Cleanroom, heat-prone setups |
Choosing the right material is the first big step to performance. Mismatched materials often result in premature wear or labeling failures.
2. Shore Hardness / Compression Level
Next, let’s talk about sponge hardness—measured in Shore A.
Too soft, and your labels may not adhere well. Too hard, and you risk damaging the product or label, especially with uneven or delicate surfaces. For most standard uses, I recommend a Shore A hardness between 20 and 40. This provides a balance of flexibility and firm contact without deforming the label.
- Soft Rollers (20–30 Shore A): Great for curved surfaces, delicate items like cosmetic bottles or ampoules.
- Firm Rollers (35–50 Shore A): Ideal for flat, rigid packaging or when higher pressure is needed to secure label adhesion.
Always test a few samples with your packaging and machine speed before committing to a full production run.
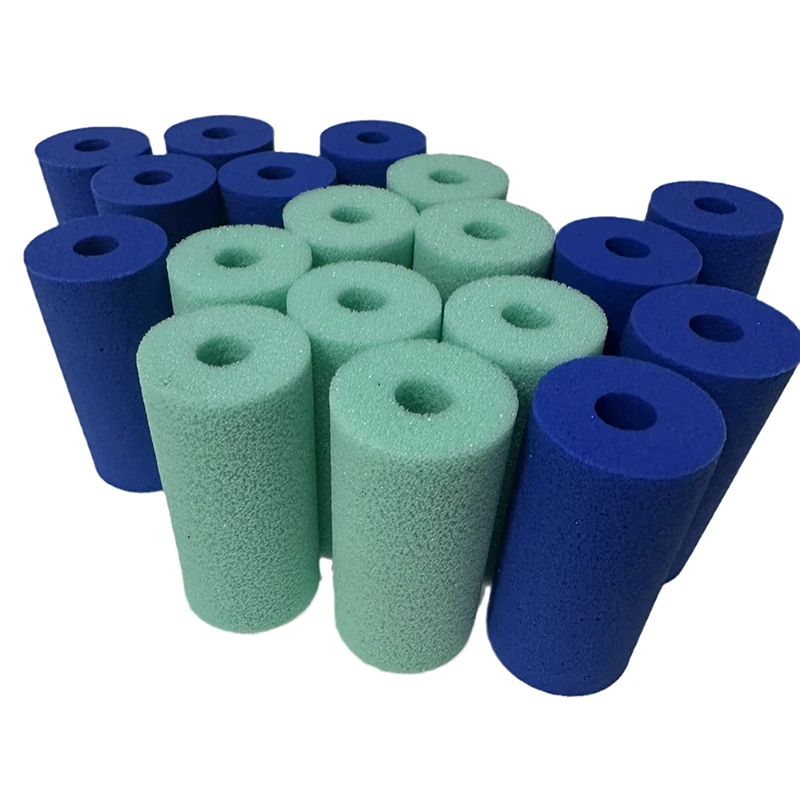
3. Roller Size and Dimensions
Roller size might seem like a mechanical detail, but it directly impacts labeling precision.
You’ll need to pay attention to:
- Outer Diameter (OD): Affects contact pressure and wrap angle.
- Core Inner Diameter (ID): Must match your machine’s spindle.
- Width: Should match the label width and container size.
If the size is off—even by a few millimeters—you risk poor alignment or roller slippage. That’s why at Kinsoe, we offer both standard and fully customizable roller sizes depending on your machine model.
4. Surface Texture and Finish
A roller’s surface finish plays a big role in grip and adhesion.
- Smooth Finish: Works well for most flat or semi-rigid surfaces. It’s easy to clean and good for general use.
- Patterned/Embossed Surface: Offers better grip, prevents air bubbles, and is ideal for curved or irregular packaging like oval bottles or blister packs.
Some clients have also requested anti-slip coatings or micro-textures to help deal with slippery product surfaces.
The right texture enhances contact without over-pressing or smudging labels.
5. Product Type and Packaging Shape
Different products demand different roller behaviors.
- Flat Surfaces (e.g., cartons, pouches): Use wider, firm rollers for consistent pressure.
- Round Bottles (e.g., beverages, pharma vials): Benefit from slightly softer or contoured rollers to ensure edge-to-edge adhesion.
- Delicate Packaging (e.g., cosmetics, glass ampoules): Require softer sponge rollers to avoid crushing or cracking.
- Rigid Packaging (e.g., canned foods): Tolerate firmer rollers with more aggressive pressure.
Think about your product’s shape and strength—match the roller softness and width accordingly.
6. Speed and Labeling Conditions
Labeling at high speed? You’ll need rollers that bounce back instantly and can handle more friction.
- High-speed lines: Choose PU or silicone for better durability and temperature resistance.
- Warm or humid environments: Opt for materials that resist swelling or slipping.
- Chemical-prone zones: Silicone or coated rollers will last longer without degradation.
Labeling conditions can silently wear out rollers—choose materials that resist your operating environment.
IV. Common Mistakes When Choosing a Roller
Over the years, I’ve seen many clients make avoidable mistakes. Here are the most common:
- Ignoring machine compatibility: Some rollers look “close enough” but have the wrong core size or diameter.
- Overlooking label-product compatibility: A perfect label-paper combo still needs the right sponge to transfer cleanly.
- Using one roller for all applications: That might seem convenient, but it’s often inefficient.
- Buying based on price alone: Cheaper rollers usually compromise on rebound, finish, or material consistency.
The cheapest choice rarely gives the best long-term performance.
V. Custom vs Standard Rollers: What’s Right for You?
If you’re just getting started, standard sponge rollers may work fine. They’re readily available and affordable.
However, if you face any of the following, it’s worth considering custom rollers:
- Unique bottle shapes or sizes
- Specialty label adhesives (e.g., heat-sensitive, textured)
- Machine with non-standard roller specs
- Demanding cleanliness or durability needs
Here’s my personal checklist for anyone sourcing sponge rollers:
- Run a sample test first with your product and label.
- Keep rollers clean—dust and glue residue kill precision.
- Replace rollers regularly before they harden or crack.
- Source from experienced suppliers who understand both materials and machine dynamics.
Good rollers don’t just stick labels—they save time, reduce rework, and keep your brand image sharp.
VII. Conclusion
Choosing the right sponge labeling roller isn’t about guesswork—it’s about matching the right material, hardness, and fit to your specific machine and product.
If you’re unsure, don’t risk costly trial-and-error. Reach out to me and the Kinsoe team—we’re happy to recommend the perfect roller or even send you samples to test. Let’s get your labeling performance to the next level.